
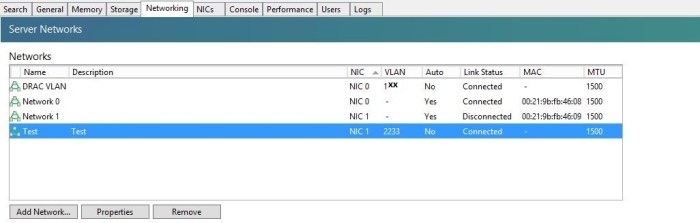
- There is always a network by default available corresponding to any physical Nic on the Xen server, for untagged traffic. (Network 0 and Network 1 in the following picture). For adding a tagged VLAN on an interface we need to add it by clicking on “Add Network” button.

- Then we keep the default selection of “External Network”. Click “Next”

- Choose a name and description for the network. Click Next.

- Then select the VLAN ID and corresponding physical interface. Click “Finish”
(The corresponding switch port has to be configured for tagged VLAN ID 2233)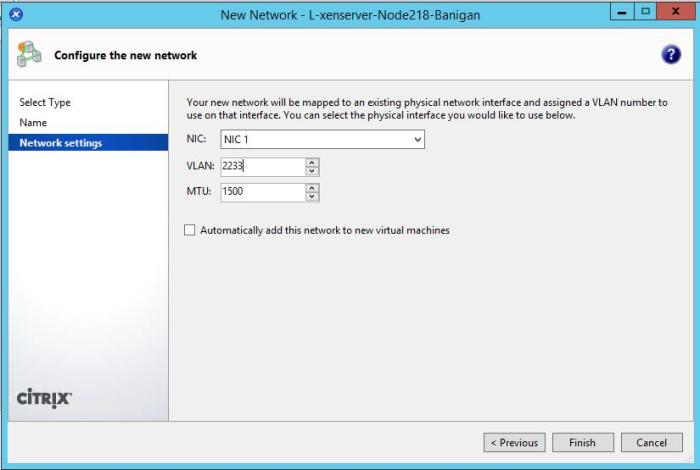
- The new virual network named “Test” has been cretaed and is shown in the list with VLAN ID 2233. Any VM that needs to be connected to this network we can add a new interface to it and assign it to the network “Test”. The VM interface will receive untagged frames.
- The networks connected to hypervisor are listed in “IP Address Configuration” section. “Network 0” is assigned to hypervisor during the installation and the corresponding Interface is named “Management”.
If we want to give access to hypervisor to any of the virtual networks, we click on “Configure” in “IP Address Configuration” section.
- In the new window that opens click on “Add IP address”

- Choose the proper network and a name for the interface and setup the IP information. Click OK.

- The interface “Test” is created in the hypervisor and is associated with the virtual network “Test”

